Can You Use a Launch Monitor Outdoors?
Evidence label: Research-led guide. This article is based on current manufacturer product and setup guidance, not hands-on testing by Tomorrows Golfer.
Short answer: yes, many launch monitors are built to work outdoors, and an open range is often the easiest place for a radar-based unit to see a full shot. The important qualification is that “outdoor capable” is not the same as “put it anywhere and trust every number”. Your surface, alignment, ball position, light, weather and available ball flight all affect whether the session is useful.
For an everyday golfer, outdoor use can be the best reason to own a launch monitor. It lets you turn a normal range session into a repeatable check on carry, launch, direction and strike pattern. It can also become a frustrating way to collect noisy data if the unit is tilted, aimed at the wrong target or placed outside its manufacturer guidance.
Who this guide is for
- Golfers planning to use a portable launch monitor at a driving range, practice ground or garden.
- Buyers deciding whether a radar or camera-based unit suits their usual practice environment.
- Anyone getting believable ball speed but questionable carry, start line or spin numbers outdoors.
Who should skip it
Skip an outdoor launch monitor if your normal venue has no safe, repeatable hitting area, if you cannot stand behind or beside the unit as its design requires, or if you mainly want simulator golf in a short indoor room. In those cases, start with our guide to golf simulator room size and check the space requirements for individual models before buying.
Can a launch monitor work outside?
It depends on the device, but outdoor use is a normal use case for plenty of current models. Foresight, for example, describes the GC3 as usable on the range or course. FlightScope says its Mevo+ can be used indoors and outdoors, with an outdoor full-swing setup requiring 7 to 9 feet from sensor to tee and unrestricted ball flight. Garmin lists the Approach R10 as a radar launch monitor with driving-range target practice features.
Those examples are not interchangeable setup instructions. They show why the first buying question is not simply “does it work outside?” but “what does this particular device need to see a shot properly?”
Outdoor use can be easier, but not automatically better
A clear range gives a radar unit the chance to follow real ball flight rather than working from a limited indoor window. That is a practical advantage when you want carry distance, apex and dispersion to reflect an actual shot rather than a simulator calculation.
There is a trade-off. A busy range bay can be uneven, windy and visually cluttered. The target line might not be obvious. Mats may put the ball at a different height from the monitor. Strong sun, rain and a phone that is overheating can make the experience less convenient even when the unit itself is technically outdoor capable.
Think of an outdoor monitor as a measurement system, not a magic scorecard. Better setup usually matters more than chasing another metric.
Radar versus camera-based monitors outdoors
Radar-based models
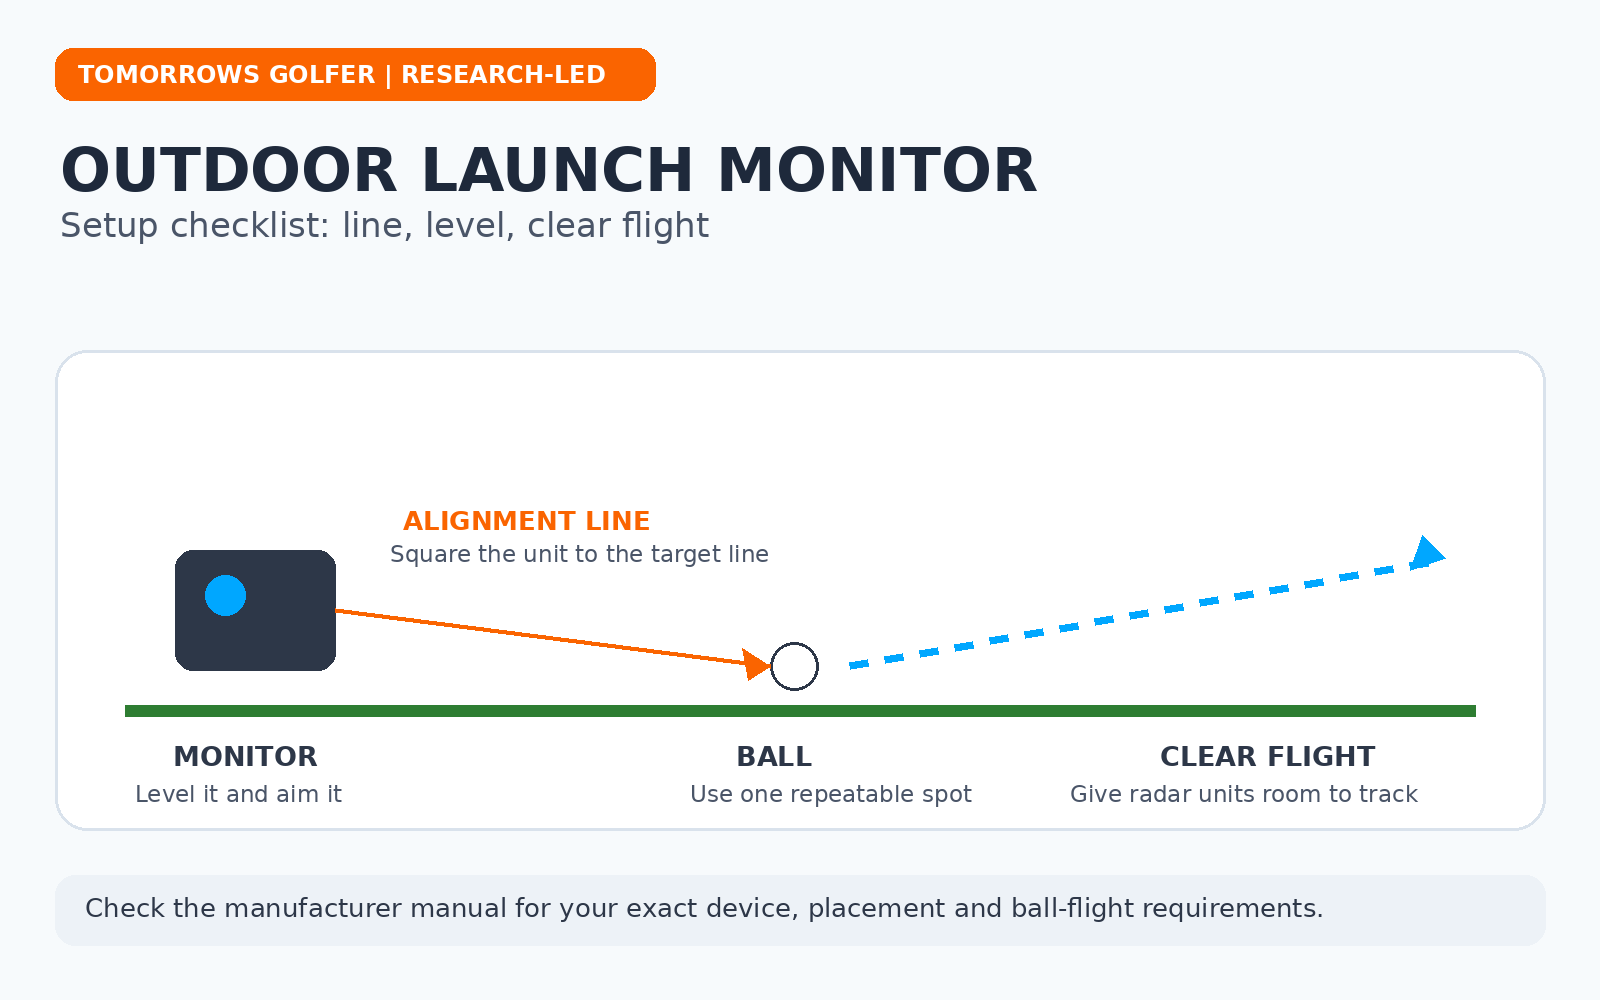
Radar units normally sit behind the ball and look down the target line. They tend to benefit from open space and a clear flight window, which makes the range a natural fit. The practical cost is that they are sensitive to their line, level and distance from the ball. A small change in placement can change what the unit thinks the target line is.
FlightScope’s own Mevo+ guidance is a useful illustration of the category rather than a rule for every radar model: it calls for 7 to 9 feet from sensor to tee outdoors and unrestricted ball flight. Its current Mevo Gen2 product page likewise says to allow 7 to 9 feet from sensor to tee for outdoor full swing. Use the figure in your own manual, not a generic number from a review.
Camera-based models
Camera-based units are generally positioned beside the ball and capture impact and the first part of flight. They can be more convenient where there is limited room behind the ball, but their outdoor performance can still depend on correct orientation, stable ground and the maker’s stated light conditions. Do not assume that a unit placed beside the ball is less fussy. It has a different set of checks.
Our radar versus camera launch monitor explainer is a useful starting point if you are choosing between the two approaches.
The outdoor setup checklist
1. Choose a straight, repeatable target line
Pick a target that is easy to identify from your hitting position. At a range, that may be a flag, a marked bay line or a specific target rather than a vague patch of fairway. Avoid aiming across the bay because it looks more open. The monitor needs the same reference line as your intended shot.
Set the unit square to that line, then make sure your feet and ball position are not quietly aimed somewhere else. An alignment stick placed on the ground can help you set the target line before you switch the device on, provided the range allows it and it is removed before hitting.
2. Get the monitor and ball on a stable, level relationship
Place the unit on a surface that will not rock, sink or move when you brush past it. A wobbly tripod, a sloping rubber mat or a monitor perched on a tee marker creates a poor starting point.
Ball height matters too. If you hit from a raised range mat, do not assume the monitor should sit on the ground several inches below the ball unless the manufacturer says that is acceptable. Use the supplied stand or a stable platform where appropriate, and check the unit’s level or alignment aid before the first shot.
3. Measure placement instead of estimating it
“About there” is fine for a casual range bucket. It is not ideal when you are comparing a seven-iron session from one week to the next. Use a tape measure, marked range mat or the device’s own setup prompts to put the monitor and ball in the right relationship.
This is especially important for radar. FlightScope’s published Mevo+ setup requirement is specific because sensor-to-tee distance is part of the measurement environment. If your own unit says 6 feet, 8 feet or a particular ball position, follow that instruction exactly.
4. Give the ball a clear window
For a full swing, choose a bay where a net, roof post, range divider or low tree is not immediately in the shot window. This is more than a safety point. Radar systems need enough unobstructed flight to do their job, while camera systems need the impact zone and early flight area their design expects.
Do not try to solve a restricted bay by moving the monitor closer or farther away from the ball unless the manufacturer specifically permits it. That can replace one problem with another.
5. Establish a sensible warm-up baseline
Hit several normal shots with one club before diagnosing your swing from a single reading. Look for a believable pattern in ball speed, launch, carry and direction. If one value is wildly different from what you saw and felt, check setup first, then repeat the shot.
For a productive range session, use the monitor to answer one question. You might compare carry with two clubs, check whether a strike change has moved launch, or see whether your starting direction matches your intended line. Our guide on using launch monitor data at the range without overthinking it explains how to keep that process simple.
Weather and light: practical limits, not an afterthought
Outdoor capability is not a promise that the device, phone and setup will enjoy every British weather day. Keep the monitor dry unless its official documentation says otherwise. Protect ports, do not leave it in standing water, and pack it away rather than hoping a shower will pass.
Bright sun can make a screen hard to read and may raise the temperature of a phone or tablet. A simple shade for your screen is usually safer than covering the monitor itself. Avoid blocking vents, cameras or sensors. If the app is struggling, move the display device into shade, reduce screen brightness where practical and let an overheating phone cool down.
Wind introduces a separate question. The monitor may capture the shot correctly, but wind can alter real carry and landing behaviour. That does not make the session useless. It means you should label it correctly. A headwind range session is useful for comparing strike or launch trends, but it is not the cleanest day to rebuild your stock carry-distance chart.
Range balls, premium balls and spin
Range balls vary in age, cover condition and flight characteristics. Some are limited-flight by design. Use them for practice patterns, but be cautious about treating every carry or spin figure as your on-course number.
Ball choice matters even more when a device needs a particular marked ball, reflective dot or approved ball type for certain spin measurements. FlightScope states that its Mevo+ limited-flight setup requires aluminium stickers. That is a model-specific requirement, not a general rule for all monitors. Check your device’s official manual before buying accessories or assuming a worn range ball will give a complete data set.
What to check before buying an outdoor launch monitor
- Placement: Does it sit behind the ball, beside it, or need a tripod?
- Required distance: What does the official manual say about sensor-to-ball distance and clear ball flight?
- Typical venue: Can your usual range accommodate that layout without blocking another bay or creating a safety issue?
- Data you actually need: Are you buying it for carry and club gapping, direction, spin, simulator play or coaching feedback?
- Ball compatibility: Are special balls, dots or stickers required for the data you care about?
- Light and weather guidance: Does the manufacturer state any outdoor or direct-light limitations?
- App and battery: Can you see and charge the companion device through a full range session?
- Portability: Will you genuinely carry, set up and realign it each time?
The practical verdict
You can use a launch monitor outdoors, and for many portable radar models the range is where the concept makes the most sense. A real, unrestricted flight gives the device room to work and gives you a more natural practice context.
The trade-off is responsibility. You need a safe, level setup, a repeatable ball position, a clear target line and the exact placement guidance for your model. If that sounds like too much friction for a quick bucket of balls, use a monitor only for planned sessions. If you enjoy structured practice, outdoor use can turn a normal range visit into useful feedback rather than a collection of guesses.